Sunday, September 23, 2018

Tips to Use 1Password and LastPass Password Managers to Autofill Passwords in iOS 12


The life of an iCloud Keychain user is pretty seamless. They can easily autofill usernames and passwords in Safari and in apps as well. In iPhone apps, the process happens automatically! Because the Face ID scan happens on its own, there’s no need to physically press a button either! Now, the same seamless experience will be available to users of third-party password managers like 1Password and LastPass as well!

There’s a new API in iOS 12 that lets third-party providers like LastPass to directly hook into iOS 12’s password autofill system. You’ll be able to fill in the username and password for any site where you have stored the credentials. One important thing to note is that this feature is only for password autofill. If you’re manually logging in to a new site, iOS won’t prompt you to save the details to LastPass (like it does when you’re using iCloud Keychain). In iOS 12, you can use up to two password managers at the same time.Gihosoft Photo Eraser Erase unwanted objects and perfect your amazing photos!

If you lost data after you updated to a new iPhone, you can always use Gihosoft iPhone Data Recovery to get the data back from the old iPhone or backup.

Jihosoft Photo Eraser

Free iTunes/iPhone Backup Extractor for iPhone, iPad

iPhone Backup Extractor - Extract Data from iPhone Backup

Jihosoft Android Data Recovery: the best Android Data Recovery software for Windows and Mac to recover deleted contacts, messages, photos, videos, WhatsApp and etc from Android devices.

Gihosoft Android data recovery Free is a super awesome software specialized in Android file recovery. With this program, you are able to recover deleted photos, music, videos, messages, contacts, call logs, WhatsApp messages, Viber chat history and more from Samsung, Huawei, LG, HTC, Motorola, Google, Oneplus, Sony, Lenovo, ZTE and other Android devices directly.

The process is the same, no matter which password manager you use. We’ll use LastPass as an example, but the feature will work just as well with 1Password as well.

Download: LastPass (Free)

Download: 1Password (Free)
Enable Third-Party Password Managers to Work with iOS 12’s Autofill Feature

First, you’ll need to make sure that the password manager of your choice supports the Autofill feature. LastPass and 1Password have already been updated to work with iOS 12’s Autofill feature.

Step 1: Open Settings -> Accounts & Passwords -> AutoFill Passwords and then enable the feature.


Step 2: Tap on the LastPass option below to enable it (or the password manager you’re using). LastPass recommends that you disable iCloud Keychain for the best experience, but you don’t have to do that.

Now, LastPass’s AutoFill integration is active.

Open the LastPass app, log in with your credentials and make sure all your logins are updated. If you don’t find any logins in there, you can manually add them by tapping the + button.
How to Autofill Passwords Using LastPass or 1Password

Now, let’s see the autofill feature in action.

Step 1: Open an app or website where you already have the login details saved in LastPass (or the password manager you’ve enabled from Settings).
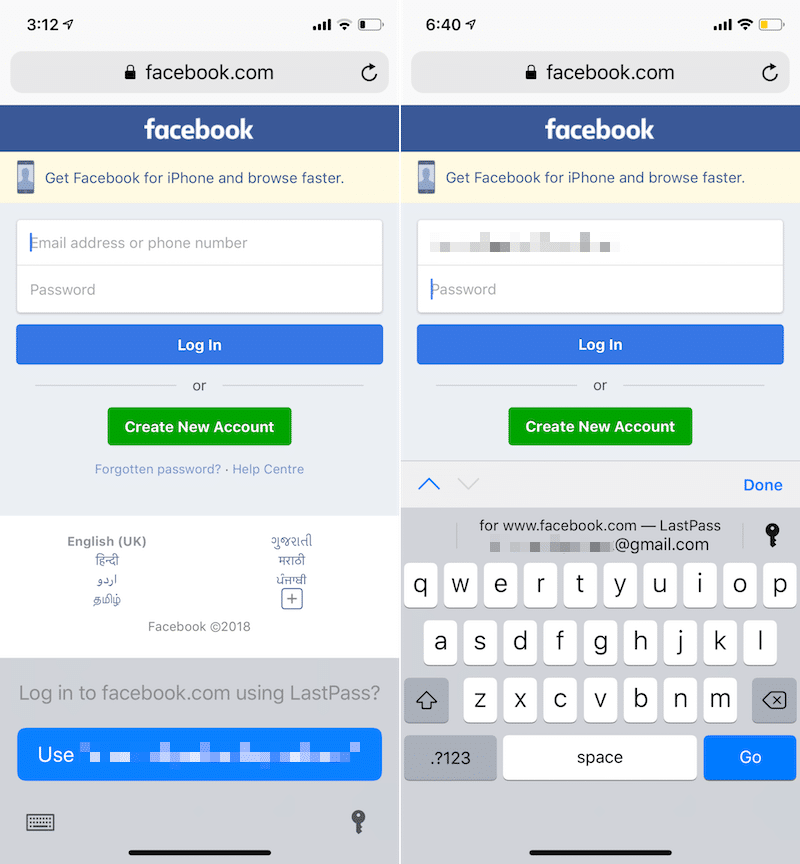


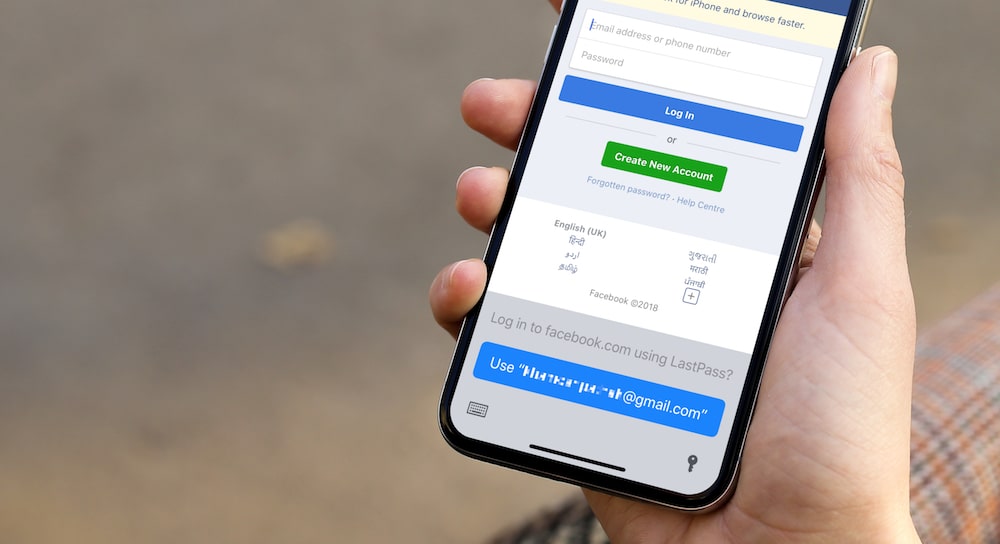
Step 2: Tap on the Username field and you should see an auto suggestion for the website above the keyboard or instead of it.

Step 3: If you don’t see a suggestion, you can tap on the little key icon. This will open LastPass with a list of all saved logins. You can select a login from here and it will be auto-filled in the page.
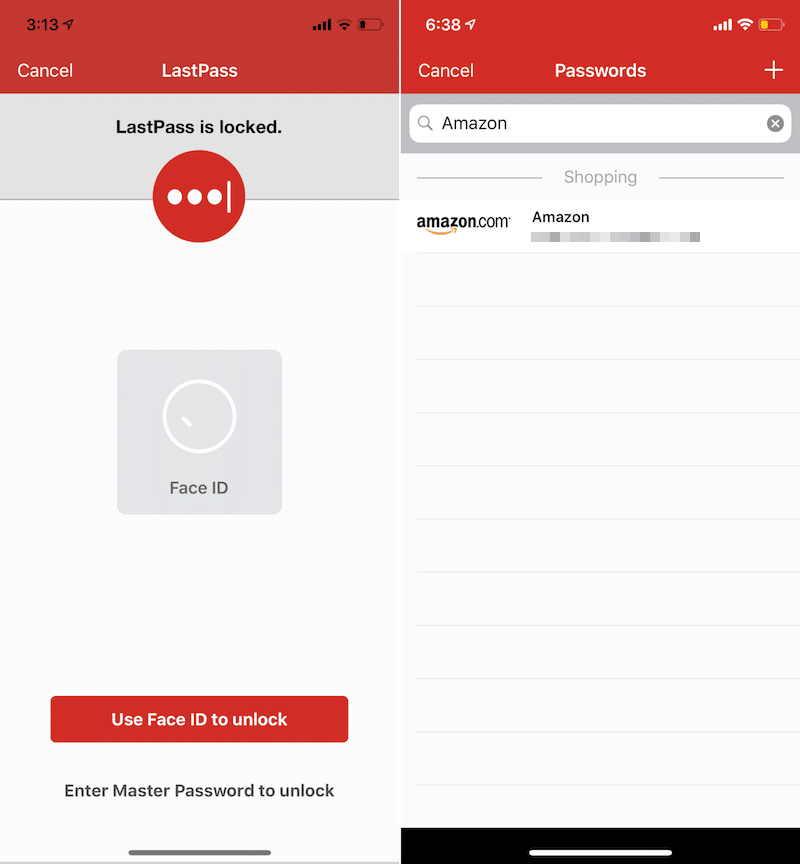


And that all there is to it. Use the LastPass website or the 1Password app on your iOS device or your Mac to add logins. Then autofill them on iOS seamlessly!

Saturday, September 22, 2018

How to Delete WhatsApp Account from iPhone


How to Delete WhatsApp Account from iPhone


How to Delete WhatsApp Account from iPhone


Step 1: First launch the WhatsApp app on your device.


Step 2: Go to Settings. It can be found on the bottom right corner.


Step 3: Tap Account.


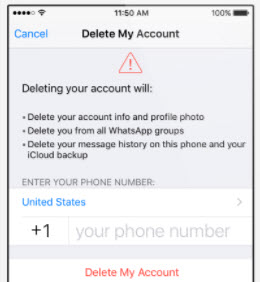
Step 4: Then tap “Delete My Account”.


Step 5: Enter your phone number and then tap “Delete My Account” again.


How to Reactivate WhatsApp Account on iPhone


It is important to note that deleting a WhatsApp account will certainly delete all messages, cancels all the information regarding payments etc. If you have deleted WhatsApp account on your device and want to reactivate it, check out the followings:


Step 1: Download the latest version of the application.


Step 2: Launch the application.


Step 3: Enter the phone number and verification code that you received via SMS. Also the name and picture that represent your profile.


Step 4: You can restore backup if you are using iCloud backup active on iPhone.


Gihosoft Photo Eraser Erase unwanted objects and perfect your amazing photos!
If you lost data after you updated to a new iPhone, you can always use Gihosoft iPhone Data Recovery to get the data back from the old iPhone or backup.
Jihosoft Photo Eraser

Free iTunes/iPhone Backup Extractor for iPhone, iPad


iPhone Backup Extractor - Extract Data from iPhone Backup


Jihosoft Android Data Recovery: the best Android Data Recovery software for Windows and Mac to recover deleted contacts, messages, photos, videos, WhatsApp and etc from Android devices.

Gihosoft Android data recovery Free is a super awesome software specialized in Android file recovery. With this program, you are able to recover deleted photos, music, videos, messages, contacts, call logs, WhatsApp messages, Viber chat history and more from Samsung, Huawei, LG, HTC, Motorola, Google, Oneplus, Sony, Lenovo, ZTE and other Android devices directly.

Tuesday, July 31, 2018

How to Recover Deleted Photos & Files from iPhone iPad

How to Recover Deleted Photos & Files from iPhone iPad


Have you ever lost photos, or accidentally deleted photos from your iPhone/iPad/iPod Touch but don’t know how to recover them? You tried several ways in Apple forum but are still in a mess because they didn’t help? Well, relax from now! In this post, we will guide you in recovering deleted photos from an iOS device using PhoneRescue that is available for both Mac and Windows.


There comes a certain scenario where important photos on our iOS device get deleted. Pictures from photo library or iCloud might disappear while you are trying to Jailbreak your iPhone. Or the device becomes completely unresponsive while after you upgrade to a new iOS. Or sometimes your iOS device gets lost or stolen, in such case we lose all the great memories and important pictures that we had on our iPhone.


But there is nothing to worry even these cases arise. Now, you can recover all the lost/deleted photos from your iOS devices with an amazing software called “PhoneRescue” from iMobie.


PhoneRescue for iPhone, a unique software can recover lost/deleted photos and even other essential things such as messages, contacts, notes, call logs and so on from your iPhone, iPad or iPad Touch in just three steps. Just Connect your iOS Device – Scan & Preview Deleted Files & Photos – Recover it! Isn’t it easy?


This amazing application has three powerful options to recover lost/deleted files & photos from your iOS device. You can either recover deleted files & photos using your iOS device, iTunes Backup or even iCloud Backup.


Let’s break them down all to get a clearer idea on how it works:


Recover from iPhone


Use this option to recover deleted files from your iPhone such as photos, contacts, messages, reminders, calendars, notes etc. Remember, your device must be in working condition and detected by PhoneRescue software. After a successful connection, you can recover deleted files from your iPhone, iPad and iPod Touch even if you have forgotten your device’s passcode.


Recover from iTunes Backup


There might be a case where your device gets damaged, stolen, lost or doesn’t respond at all. But if you have backed up your device on iTunes, then you don’t have to worry at all. In that case, the “Recover from iTunes Backup” option will save you. It can recover data from all the iTunes backups that are available on your computer.


Recover using iCloud Backup


This option is similar to “Recover from iTunes Backup”. The only difference is you use iCloud account to recover files from iCloud. All you need to do is enter the Apple ID and Password of an iCloud account where you use to back up all the files on your iPhone/iPad and PhoneRescue will do the rest of things for you.

Sponsor Ads:

Gihosoft Free iPhone Data Recovery is a professional iPhone Data Recovery software to get back all your lost text message, photo, video, call history, note, contact and more from iPhone/iPad/iPod Touch. It offers a full solution to recover your lost data in different tough situations. Besides recovering data directly from iPhone, iPad and iPod touch, it also allows you to recover data from iCloud and iTunes backup files.

iPhone backup unlocker:Recover iTunes Backup Password.

iPhone backup extractor free:The best iPhone Backup Extractor software to extract photos, text messages, contacts, voice memos, note, WhatsApp, Viber and etc from iPhone/iPad backup.


Monday, July 30, 2018

Download iOS 12 Beta 5 without developer account

Download iOS 12 Beta 5 without developer account
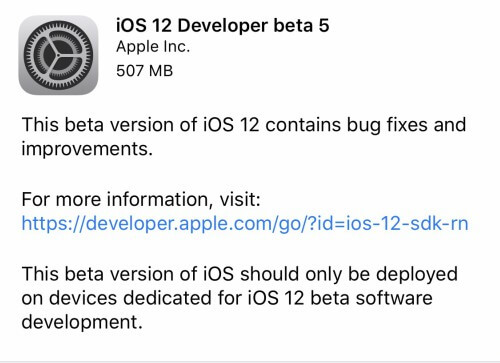
Apple just released the fifth developer beta build of iOS 12 firmware. You can download this version for your iPhone, iPad, and iPod touch below.
Download iOS 12 Beta 5 without developer account

Table of Contents


What’s new in iOS 12 Beta 5?


Download iOS 12 Beta 5


OTA Profile


iPhone


iPad


iPod


Should you upgrade?
WHAT’S NEW IN IOS 12 BETA 5?

Apple has surprised everyone by releasing today the fifth beta iteration of iOS 12. Generally, Apple seeds beta builds for registered developers on Tuesday.

This version quashes some annoying bugs and brings stability improvements to all Apple devices. The build number of this beta is 16A5339e and it weighs around 500MB on all devices.

Here are a few bugs that this version fixes –


An error message might appear while installing an app via the App Store.


Paired Bluetooth accessories may not work properly after restarting the device.


Screen Time data not syncing properly between devices.


Wallet app crashing on launch.


If you are a registered developer, you can download the iOS 12 Beta 5 update straight from your Apple Developer Center dashboard.

Average users will have to wait for the public release of this beta. Thankfully, you can easily bypass this limitation using the direct downloads links given below.iphonerecovery.com
If you use android phones, please choose Gihosoft Android Data Recovery.With Gihosoft Android Data Recovery, no longer afraid of data loss!

All you need to do is grab the OTA profile given below, install it on your device, and you will be able to download iOS 12 Beta 5 instantly.

If you want to perform a clean restore, be sure to download the IPSW file for your device.
DOWNLOAD IOS 12 BETA 5
OTA PROFILE


Download
IPHONE


iPhone SE, iPhone 5s


iPhone 6s, iPhone 6


iPhone 6s Plus, iPhone 6 Plus


iPhone 8, iPhone 7


iPhone 8 Plus, iPhone 7 Plus


iPhone X
IPAD


iPad Air, iPad mini 2


iPad mini 4, iPad Air 2, iPad mini 3


iPad (5th generation), iPad (6th generation)


iPad Pro (9.7‑inch)


iPad Pro (12.9‑inch)


iPad Pro (10.5-inch), iPad Pro (12.9-inch) (2nd generation)
IPOD


iPod touch (6th generation)
SHOULD YOU UPGRADE?

iOS 12 Developer Beta 5 is a minor update and you don’t need to upgrade if your device is running just fine.

However, if you are affected by the various bugs and glitches present in its predecessor, you should definitely consider updating.

All in all, there aren’t many changes in this version and you should probably wait for beta 6 before updating.

Sponsor Ads:

Gihosoft Free iPhone Data Recovery is a professional iPhone Data Recovery software to get back all your lost text message, photo, video, call history, note, contact and more from iPhone/iPad/iPod Touch. It offers a full solution to recover your lost data in different tough situations. Besides recovering data directly from iPhone, iPad and iPod touch, it also allows you to recover data from iCloud and iTunes backup files.

iPhone backup unlocker:Recover iTunes Backup Password.

iPhone backup extractor free:The best iPhone Backup Extractor software to extract photos, text messages, contacts, voice memos, note, WhatsApp, Viber and etc from iPhone/iPad backup.


Monday, July 16, 2018

How to duplicate the Voice Memos on iPhone in iOS 12

How to duplicate the Voice Memos on iPhone in iOS 12
On iPhone, iPad


Step #1: Open up the “Voice Memos” app on your iPhone.


Step #2: Select and “open the recording” of which you want to make a duplicate.


Step #3: Now, hit the “three dots” below the recording.


Step #4: Choose the “Duplicate” option.


That’s it! Once you will tap on the Duplicate option, it will create a duplicate file of the existing recording with postfix name …copy.

If you use android phones, please choose Gihosoft Android Data Recovery.With Gihosoft Android Data Recovery, no longer afraid of data loss!

Note: we didn’t find way to duplicate voice memo on iPad. If you get, comment me on bottom cement box of this article.


Keep note that there are other options available when you tap on three dots, Sharing Voice Memos, Deleting and Edit memos.


Jihosoft iPhone Backup Extractor Extract and recover all types of data from iPhone backup files, such as camera roll photos, videos, SMS, contacts, reminders, WhatsApp, and etc.


Gihosoft Free iPhone Data Recovery is a professional iPhone Data Recovery software to get back all your lost text message, photo, video, call history, note, contact and more from iPhone/iPad/iPod Touch.

Set Up iCloud Photo Sharing on iPhone, iPad, Mac, or Windows 2019 Guide


iPad, Mac, or Windows PC


Quick access:


How to Get Into iCloud Photo Sharing on iPhone and iPad


How to Set Up iCloud Photo Sharing on your Mac


How to Enable iCloud Photo Sharing on your Windows PC


What are the requirements to use iCloud Photo Sharing? As it uses the iCloud account, you and all the people you wish to invite need to have it. Apple offers up to 5GB of free iCloud storage. If your file size exceeds the basic offering, you will have to upgrade the plan.


What about those who don’t have iCloud account? Well, with iOS 12 and macOS Mojave, Apple lets you share your photo album even with those who don’t have iCloud account. Besides, you can also share specific photos using the expiring link with anyone from your iPhone running iOS 12. Do note that these new methods don’t offer the same level of privacy.
The File Formats that Support iCloud Photo Sharing


iCloud Photo Sharing is compatible with multiple file types including HEIF, JPEG, RAW, PNG, GIF, TIFF, and MP4. It also has the support for slo-mo, time-lapse, and Live Photos.


Your shared images (captured by point-and-shoot cameras, SLR cameras, or iOS devices) feature 2048 pixels on the long edge. Panoramic photos are up to 5400 pixels wide.


iCloud Photo Sharing is compatible with HEVC, MP4, QuickTime video file types, and H.264 and MPEG-4 Video file formats.


The shared videos can be up to fifteen minutes in length. They are delivered at up to 720p resolution. Besides, your GIFs need to be 100MB or smaller.


Make Sure:


Ensure that you have enabled iCloud on all of your devices.


Be sure all of your devices are using the same iCloud account.


Make sure your PC is running Windows 7 or later. Besides, ensure that you have already downloaded iCloud for Windows if you wish to enable this feature on your PC.
How to Get Into iCloud Photo Sharing on iPhone and iPad


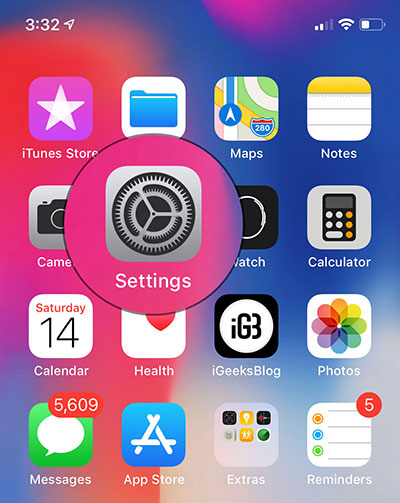
Step #1. Launch the Settings app on your iOS device.


Step #2. Now, tap on Photos.


Sponsored Links


Step #3. Turn on the switch next to iCloud Photo Sharing.


Note: In iOS 12, you need to turn on the switch next to Shared Albums. Settings → Photos → Shared Albums.


That’s it! You have enabled this feature on your iOS device.


If you ever wished to turn it off, follow the same steps mentioned above and turn off the switch in the end.If you accidentally deleted or lost videos on iPhone, first please check on the Recently Deleted folder. Alternatively, you can use the professional tool Gihosoft iPhone Recovery to recover deleted iPhone videos from Camera Roll or some apps.


How to Set Up iCloud Photo Sharing on your MacMust Read:If you lost data after you updated to a new iPhone, you can always use Gihosoft iPhone Data Recovery to get the data back from the old iPhone or backup.
Gihosoft Free iPhone Data Recovery:iphonerecovery.com
If you use android phones, please choose Gihosoft Android Data Recovery


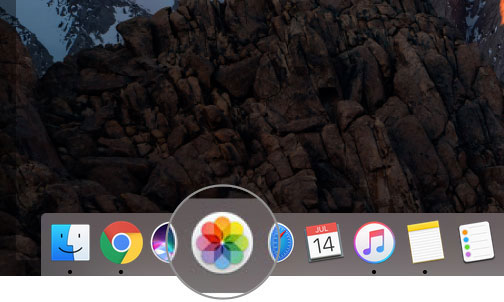
Step #1. Open Photos app on your Mac.


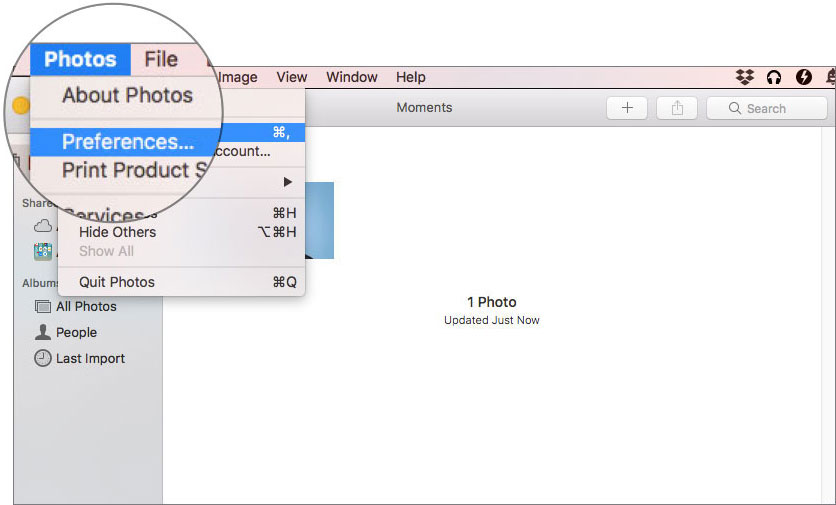
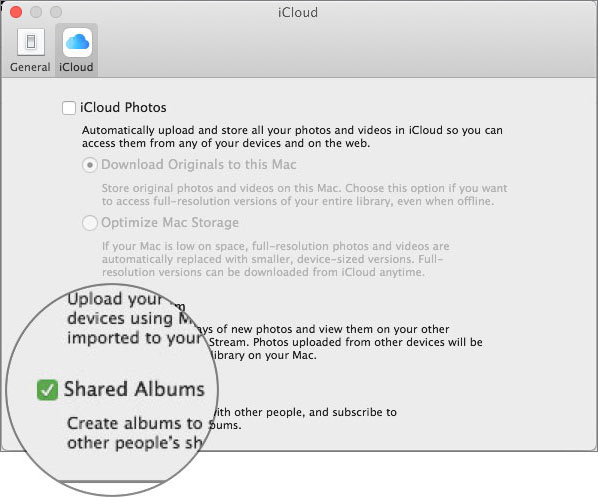
Step #2. Now, select Photos in the left corner and then click on Preferences from the drop-down menu.


Step #4. Next, click on iCloud tab.


Step #5. Next up, check the box for iCloud Photo Sharing.


Note: In macOS Mojave, you need to tick the box for Shared Albums.


How to Enable iCloud Photo Sharing on your Windows PC


Step #1. Open iCloud app on your computer.


Step #2. Now, click on the Options button next to Photos.


Step #3. Next up, tick the box for iCloud Photo Sharing.


That’s done!


Your take!


I do enjoy blasting some of my coolest clips and shots on social media apps like Facebook and Instagram. However, if I have to share some personal stuff, I always choose to go this way. Let me know what you think of it and whether you would like to give it a go as well.

Sunday, July 15, 2018

Add Music to iTunes from iPhone/PC 2018 Guide


How to Add Music to iTunes via iTunes
1 Add Music from iPhone to iTunes


To add music from iPhone to iTunes easily, follow the steps below:


Install iTunes and click on the software to launch


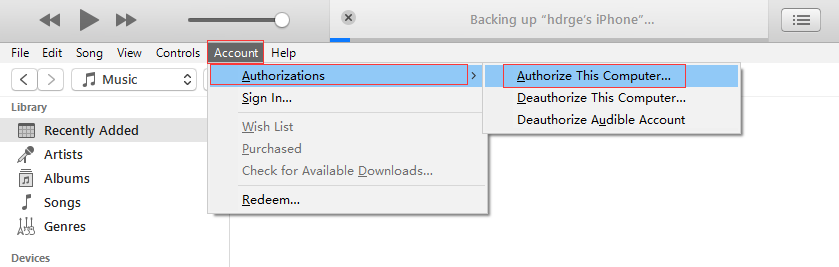
On the Account menu, click on "Authorization" and then choose "Authorize this Computer" to grant the computer the permission to access and use your Apple ID.


Now login using your Details (Apple ID and password).


Select Authorize to finalize the authorization process.


Using a USB cable, plug in your iPhone to your computer.


Tap "File Menu >> Devices", then select Transfer Purchases from iPhone to complete the process.


2 Add Music Files Or Folder from PC to iTunes


Launch iTunes software


Hit "Edit > Preference > Advanced". Check to make sure that it is set to "Copy files to the iTunes Media folder when adding to library".


Tap OK


From the File menu click on "Add File to Library". For Mac users select "Add to library".


From your music library, browse and select your desired music files to add to your iTunes library


Once that is done, iTunes will immediately start copying your selected files to your iTunes music folder.
Limits/Disadvantages About iTunes


1. iTunes doesn’t detect duplicates, instead it transfers all files. This consumes too much space


2. Supports only 5 devices and limited to only one Apple ID


3. iTunes only transfers music purchased from iTunes


Bonus Tips:


11 BEST IPHONE X SECRET TIPS AND TRICKS EVERYONE SHOULD KNOW 2018


1. Open the App Switcher like a pro:


Swipe up from the bottom to the middle of your screen and hold until you see the App Switcher.


Swipe left or right to find the app that you want to use.


Tap the app. Gihosoft Free iPhone Data Recovery is a professional iPhone Data Recovery software to get back all your lost text message, photo, video, call history, note, contact and more from iPhone/iPad/iPod Touch.


2. Bring back the home button (sort of): Go to General > Accessibility > AssistiveTouch and turn it on. You’ll now see a virtual home button that you can customize to activate shortcuts.


3. Unlock with Face ID faster: Turn off attention detection, Face ID needs a certain set of data each time it’s used, and there’s no getting around that. Face ID needs to be able to detect your eyes, nose, and mouth. While it can detect your eyes even when they’re closed (if attention is off), you’ll need to have your nose and mouth uncovered if you plan on unlocking your iPhone X with your face.


4. Show battery percentage: To show the battery percentage in the status bar, go to Settings > Battery and turn on Battery Percentage. Swipe down from the top-right corner of the iPhone X’s display to open Control Center, and check, the battery percentage is included.


5. How to disable Face ID in an instant: If you don’t want Face ID to require that you look with your eyes open at iPhone X, you can open Settings > General > Accessibility, and disable Require Attention for Face ID. This is automatically disabled if you enable VoiceOver during initial set up.


6. Flip quickly between apps


7. Save up to 60% battery life: Check which wallpaper you using, Which apps running back and consuming energy.


8. Make Control Center easier to reach: Go to Settings > Accessibility > Reachability.


9. Quiet alarms with your Face: After picking it up, Face ID will look for your face, and if it see it, it’ll automatically lower the volume.


10. Animoji as stickers


11. Tap to wake: Many Android phones have had a “double-tap to wake” up the display feature for years. Now, iPhone X users have a similar feature, only it only requires a tap.


If you accidentally deleted or lost videos on iPhone, first please check on the Recently Deleted folder. Alternatively, you can use the professional tool Gihosoft iPhone Recovery to recover deleted iPhone videos from Camera Roll or some apps.